Aperture
Aperture is one of the three corners of the exposure triangle. It is important to understand, because knowing how to master aperture can help you allow the correct amount of light into your camera and control the blur, or bokeh, in your background.
Aperture refers to an opening in the camera lens that allows light to pass through. The wider the aperture (lower number), the more light that is being let through. Think of it as the pupil of an eye. If the eye needs more light, the pupil will grow bigger to allow more light to pass through. It is the same with the aperture of a camera. If you want more light in your images, you can lower your aperture. This is referred to as shooting “wide open.” This is a style that many photographers, including myself, really love.
Besides letting in light, another great benefit to shooting wide open is the blurred background you get. The lower the aperture number, the smaller the focal plane will be in your image. So if you are shooting a very close up shot of a face with an aperture of 1.2, the eyes will be in focus but the nose and ears might not be, because they aren’t on the same plane as the eyes. Photographers use this to their advantage. They shoot wide open so that they can have that dreamy, light background. If you are going to shoot with a low aperture, though, remember that the focal plain is much smaller than it would be with a higher number aperture. So it might be hard to get everyone in focus if you are shooting a portrait with several rows.
Here are my preferred focal lengths for portraits:
Individuals: 2.2
Couples: 2.2-2.8
Families: 2.8-4
Extended families: 4-5.6
Helpful tip: The focal plane is 1/3 in front of your focus point and 2/3 behind them. So, if you are shooting an extended family, with two rows, its best to set your focus on someone in the front row. If you are shooting a bridal party with four rows, choose someone on the second row. That way, it will catch 1/3 in front of the second row and 2/3 behind it and hopefully get everyone in focus.
Here are some example images with different aperture settings. I didn’t edit them to allow you to see the difference of both the light coming into the images and the blurred backgrounds.
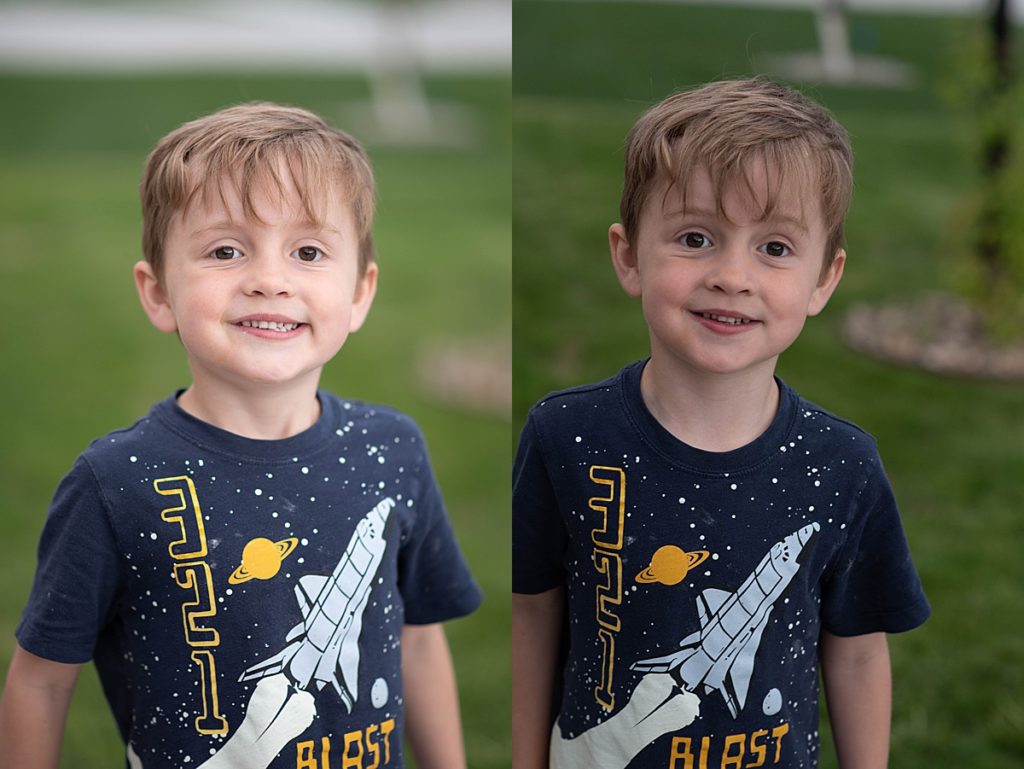
1.8 vs. 4.0 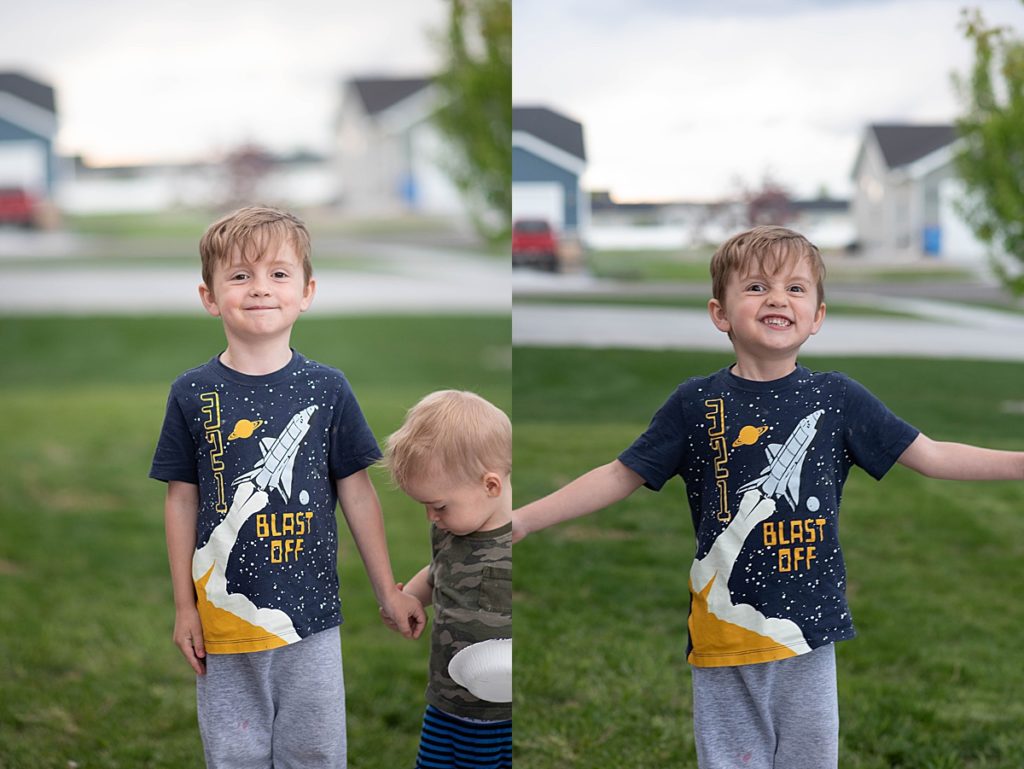
1.8 vs. 4.0 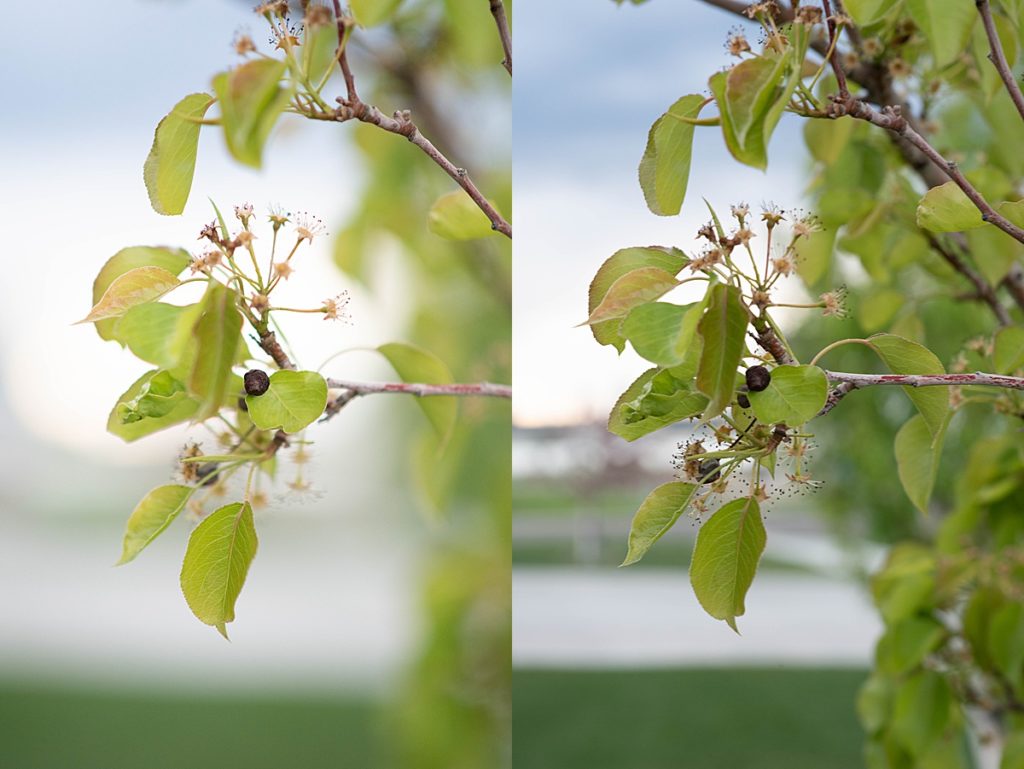
1.8 vs. 9.0 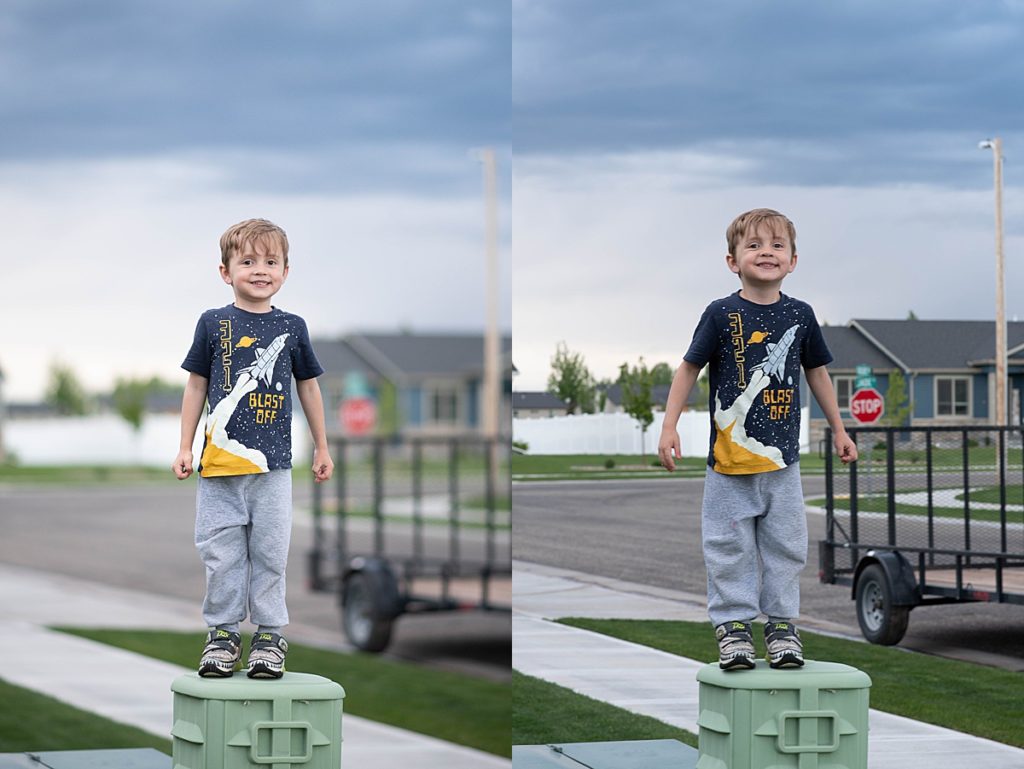
1.8 vs. 9.0 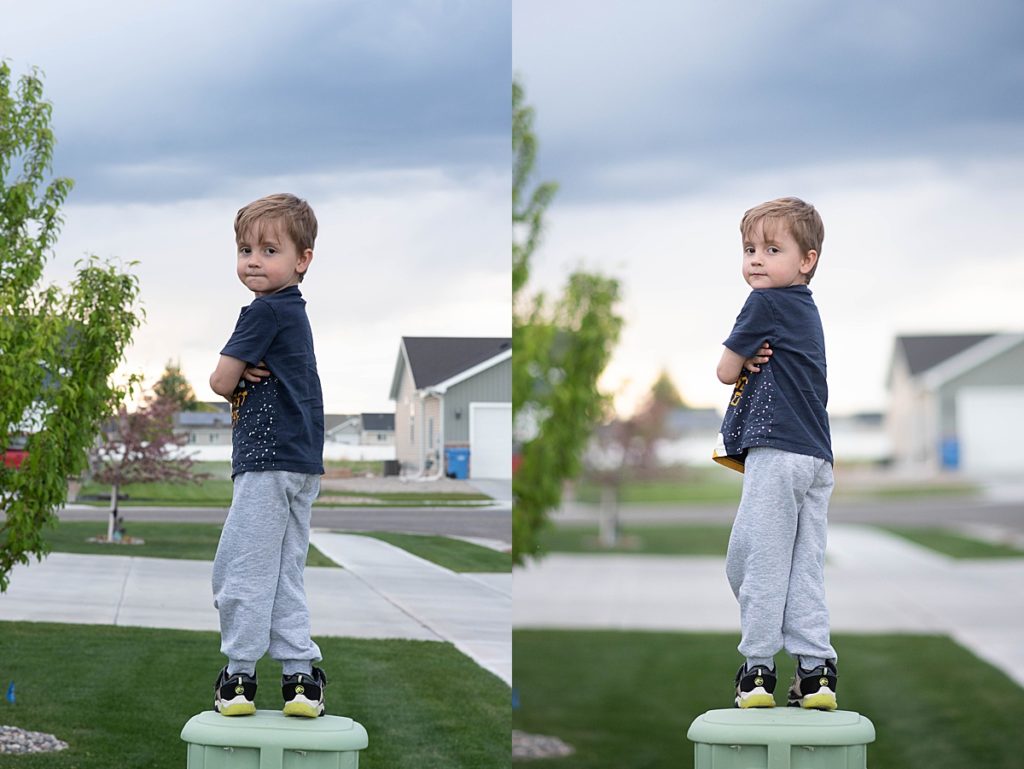
1.8 vs. 9.0 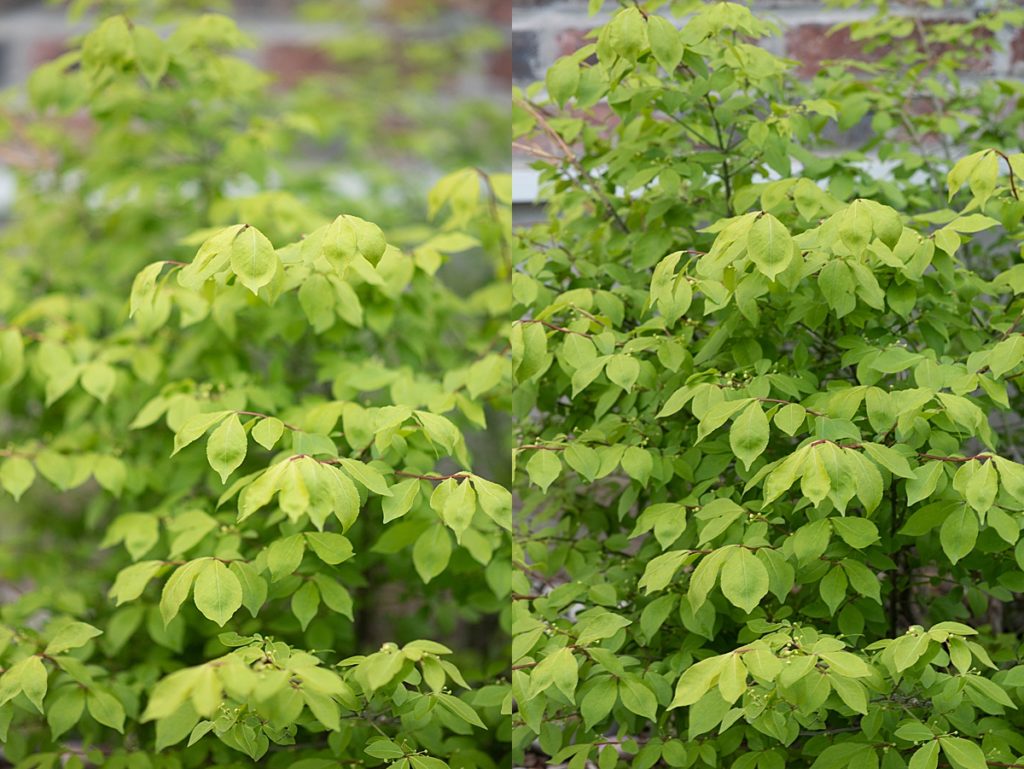
1.8 vs. 9.0 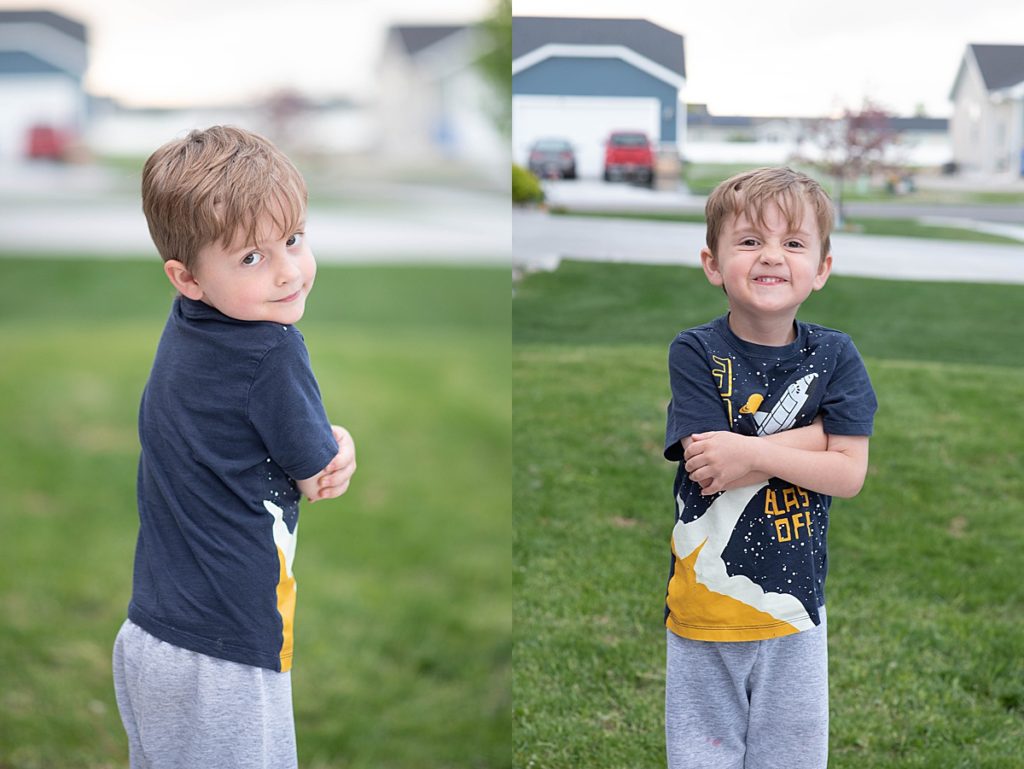
1.8 vs. 6.3 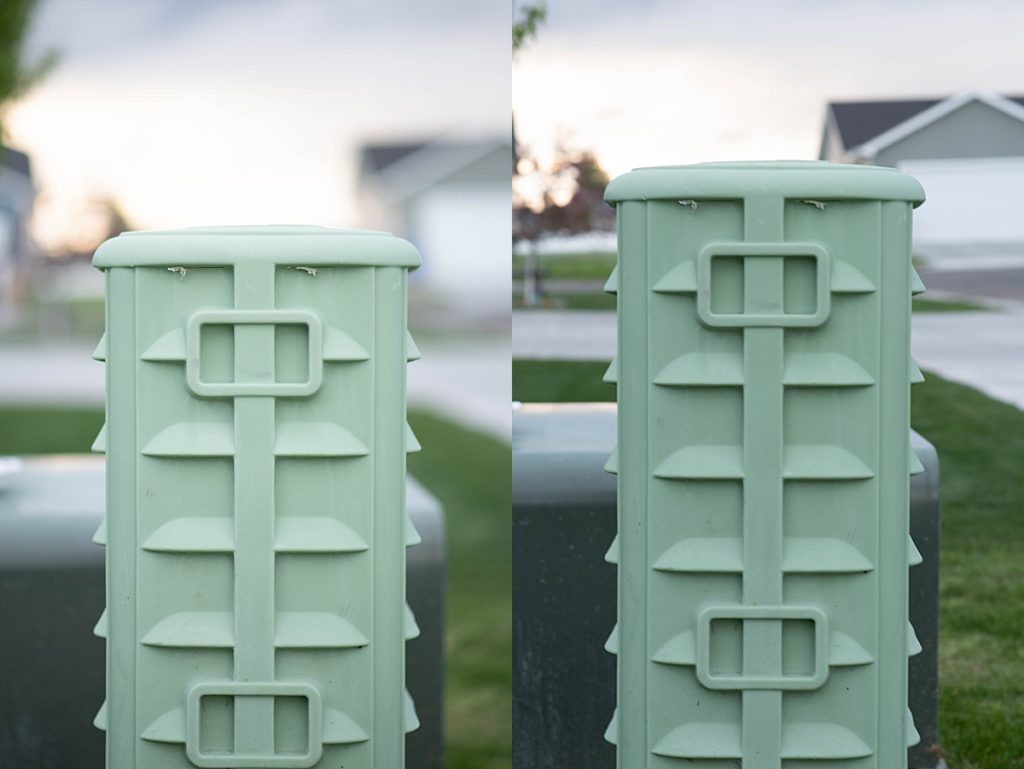
1.8 vs. 6.3